

Branding and documents
Quotations, order acknowledgements, delivery notes, invoices, proformas, purchase orders, goods received notes and works orders are all made from the same settings, so they look like they belong together.
Branding
Section titled “Branding”Administration → Documents → Branding sets the look of every document:
- Logo: PNG or JPEG, up to 1 MB. It’s saved as soon as you upload it.
- Colours: the accent colour and table heading text colour. Pick one from the swatch or type its hex code, such as
#336699: each follows the other. - Font and paper size.
- Company details printed beside the logo. The details themselves come from Company settings.
- Footer: text, and an optional picture for the foot of every page, such as accreditation logos or a letterhead strip. PNG or JPEG, up to 2 MB.
Select Preview to see a sample before you save.
Document templates
Section titled “Document templates”Document templates sets the layout of each type of document:
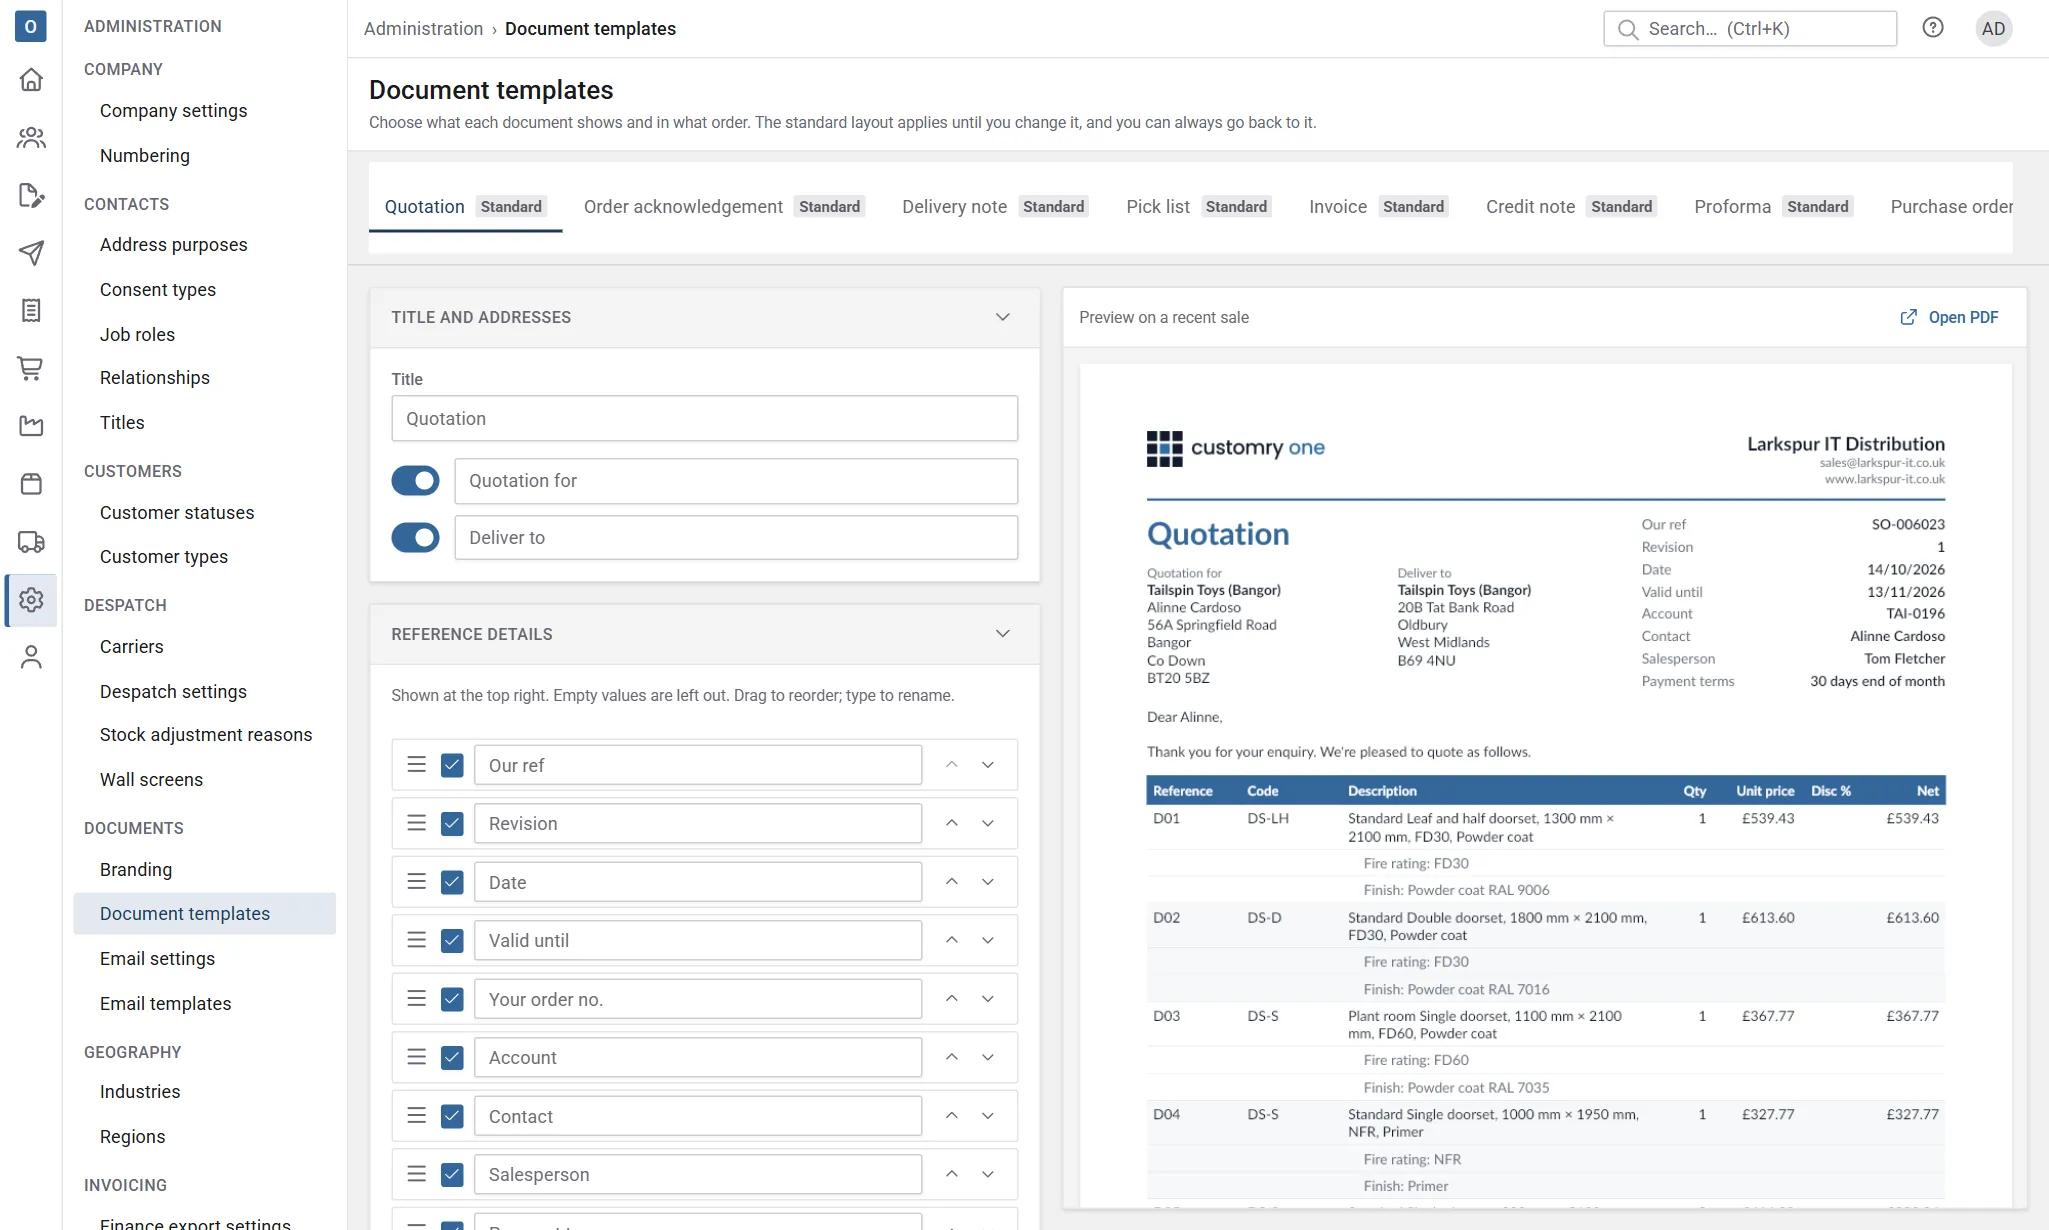
- the headings for the customer and delivery addresses,
- the reference details at the top right, such as order number and date. Drag to reorder and type to rename; empty values are left out,
- the sections after the addresses, top to bottom,
- the columns in the table of lines. The Reference column (a configured item’s reference) is only printed when a line on the document has one.
For invoices that cover several orders, choose whether each order gets its own heading with its lines and carriage, or whether all lines go in one list.
Works orders print a QR code of the works order’s number beside the reference details on the first page, for the Shop floor page to scan. Switch Print a QR code of the number off under the reference details to leave it off.
Cutting list sets the layout of cutting lists: the reference details (the works order, what it’s making, the quantity, due date and when it was printed), the columns of each material’s pieces (the works order, which only prints on a list for several works orders, the item, the piece, its length and width, and how many), and the sections: Pieces by material, Bar plan (each bar drawn to scale), Sheets, Reusable offcuts, the works order’s instructions and the closing text. A list for one works order prints its QR code, unless you switch it off. Like works orders, cutting lists never show costs and aren’t emailed. The preview uses the latest works order with cut pieces, or a sample.
The schedule
Section titled “The schedule”Quotations and order acknowledgements have a Schedule section, after Totals to start with: a table for each family of configured items, with their references, printed schedule fields (such as the location) and the family’s schedule columns. When a sale has items on more than one schedule, the section has a part for each schedule, in the order of your schedules, and each table is headed by its schedule’s name (with the family’s name too when that schedule has more than one family on the sale, such as Unit schedule: Steel units). A sale on one schedule prints as before, with each table headed by its family’s name. It’s left out of documents that have nothing to show in it. Its options are in the Schedule panel:
- Show the unit price and net: each item’s price in the table. Switch it off for a schedule without prices; the lines table above still has them.
- Description: Without columns prints each item’s description only for families with no schedule columns, where it’s the only way to tell items apart. Always and Never do what they say.
- Print it on landscape pages: the schedule starts on a new page turned sideways, on the same paper size, so wide tables fit. The sections after it carry on upright pages. Every page keeps your branding, header and footer, and page numbers count through the whole document.
- Start it on a new page: on, the schedule starts a new page, and when a sale has more than one schedule, each schedule after the first starts a new page too, upright or landscape. Off, an upright schedule follows straight on from the section before it, and the schedules follow on from each other. (Landscape pages always start a new page.)
Turn the section off in the Sections list to leave the schedule off a document altogether. Which schedule fields print, and in what order, is set on each schedule in Products → Configurator → Schedules (see Schedules), and which attributes are columns on the family’s Details tab. Only items whose family is on a schedule print.
A schedule can override two of these options for its own items: its Prices (Show or Hide) and its Description (Without columns, Always or Never). Left at As the document template, the options here apply. Landscape and starting on a new page always come from the template.
The preview uses a recent real document of that type, or sample data if there isn’t one yet. The sample has one schedule with two items. Reset to default puts a template back as it came.
Email templates
Section titled “Email templates”Email templates sets the subject and wording of the email for each document. The document is attached as a PDF. Values in double braces, such as the contact’s name, are filled in when it’s sent.
Email settings
Section titled “Email settings”Until a mail server is set up, Customry One only writes emails to a log, and nobody receives them. Everyone sending a document is told so.
In Email settings, switch on your own server and enter its details: server address, port, username and password, and the address emails come from (and replies go to). Then select Send test email to check it works.