

Cutting lists
A made part whose configuration has cut pieces (see Made parts’ materials) takes them onto its works order. The cutting list says what to cut: every piece for every item, by material, with the bars planned so they waste as little as possible and the sheets worked out by area. It’s never stored: it’s worked out each time from the works order, so it always matches what’s on it.
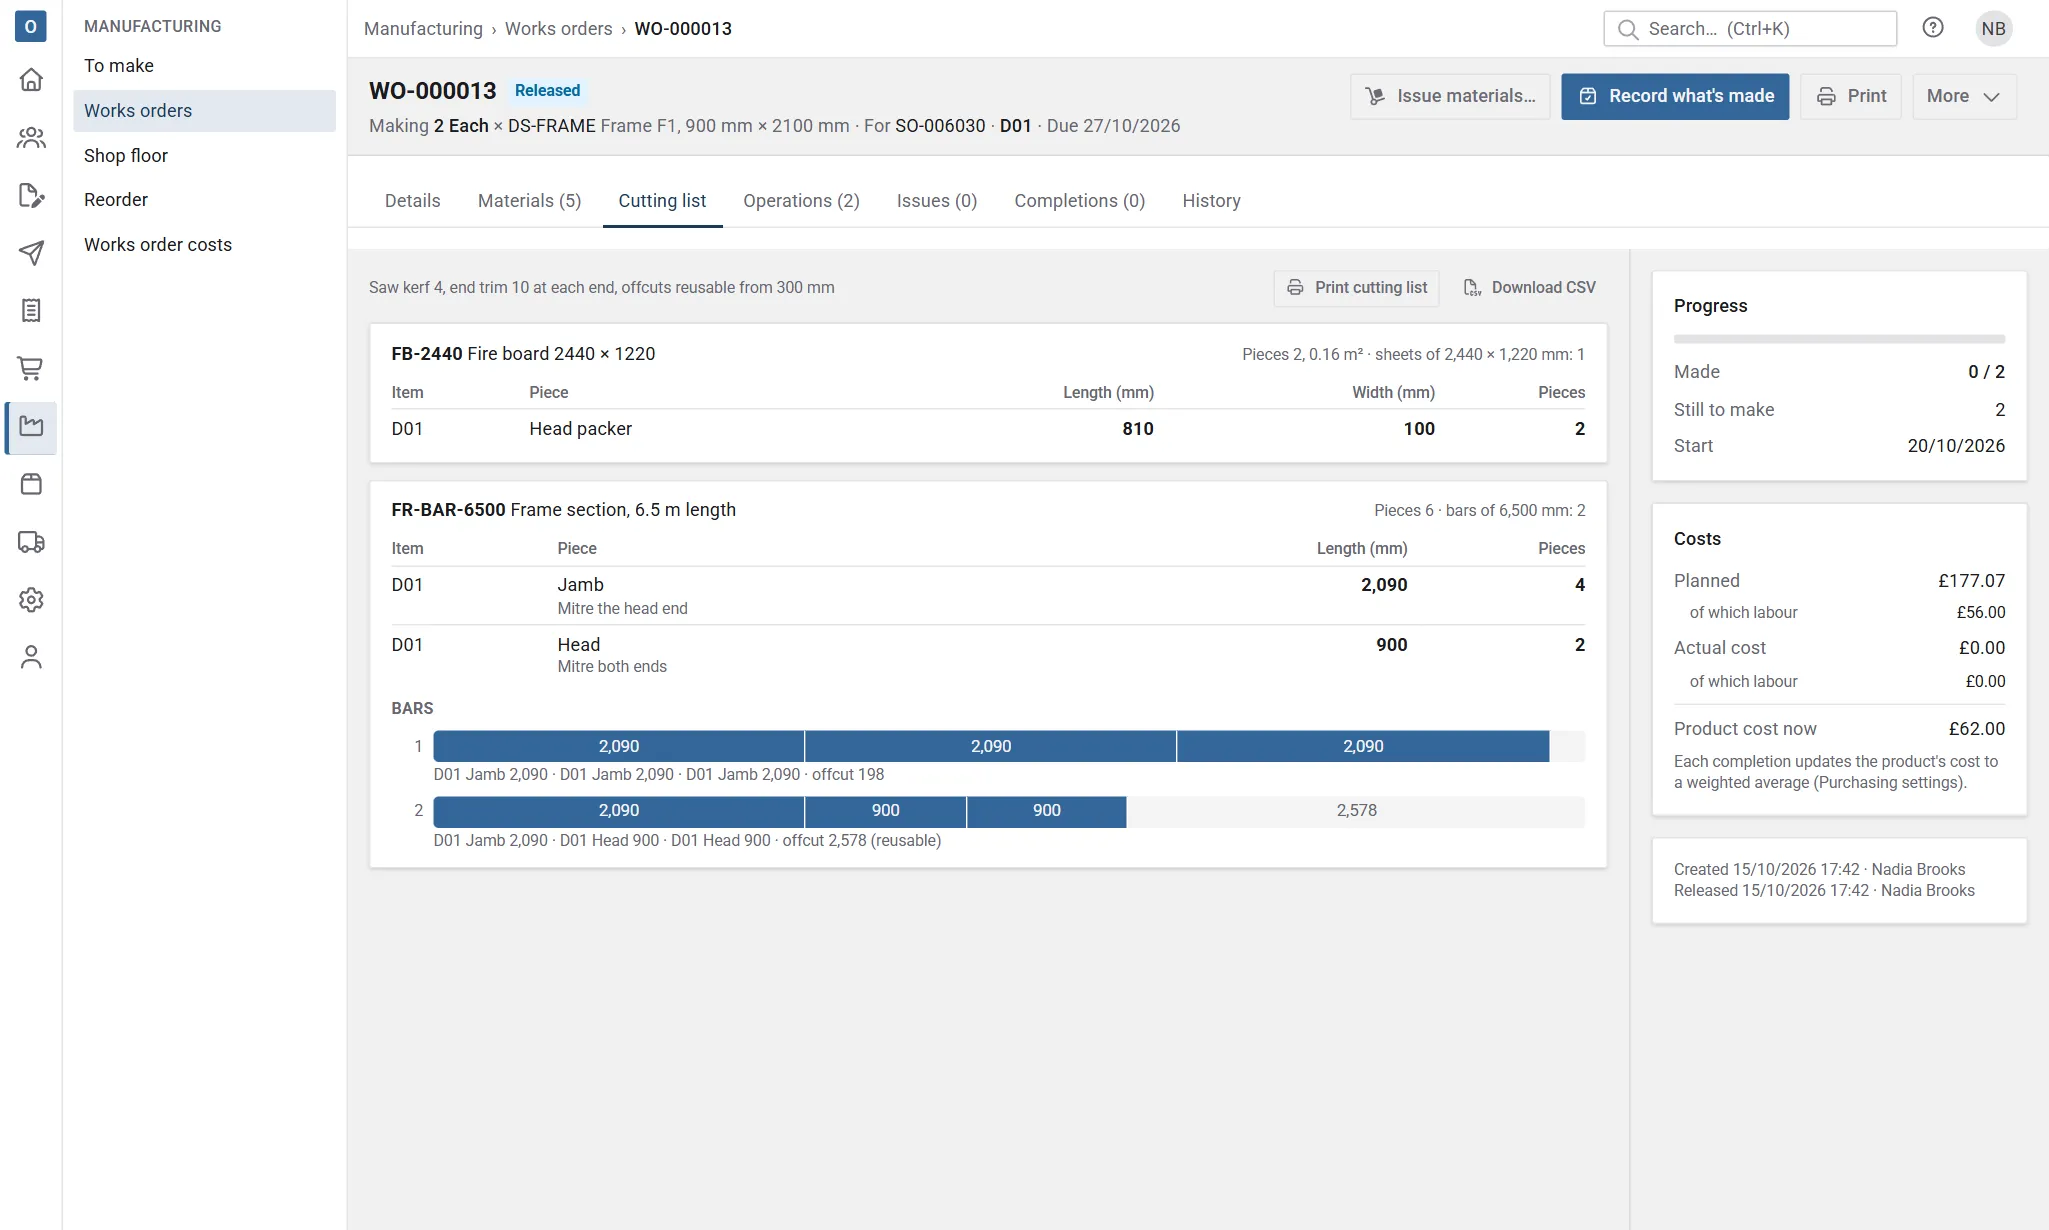
A works order’s cutting list
Section titled “A works order’s cutting list”Open the works order and select the Cutting list tab. It’s only there when the works order has cut pieces. For each material it shows:
- The pieces: the item each is for (its reference, else its description), the piece’s name and note, its length (and width, for a sheet), and how many. A piece’s count is the number per made part × that item’s quantity, so a works order for several items lists each item’s pieces for its own quantity.
- What’s needed, in a line beside the material: “Pieces 6 · bars of 6,000 mm: 2”, “Pieces 2, 3.17 m² · sheets of 2,440 × 1,220 mm: 2”, or, for a product stocked by a unit of length or area (metres, square metres), the quantity in that unit.
- The bars, one row each, drawn to scale: each piece in the order it’s cut, then the offcut (what’s left after the last cut), paler. The line under each bar names the pieces. An offcut at least as long as the Minimum reusable offcut is marked reusable, to put by; a shorter one is waste. Offcuts aren’t added to stock.
The line at the top says the saw kerf, end trim and minimum offcut it used, from Manufacturing settings.
Lengths are in the Cutting unit (mm unless you’ve changed it).
How the bars are planned
Section titled “How the bars are planned”Each bar loses the end trim at both ends, and each cut takes the saw kerf. The pieces are then packed onto as few bars as it can find: it works out two plans, longest pieces first into the first bar with room, and each bar in turn filled as full as the pieces left allow, and keeps the one with fewer bars. The plan is always the same for the same pieces. It’s a good plan, usually the fewest bars possible and otherwise within about one bar of it, but not guaranteed to be the very best.
A piece longer than its bar can’t be planned: it’s named in a warning and left off the bars. A material with no cut length (see Cut sizes) and no unit of length shows a warning instead of bars; give it one and the list works it out.
With Optimise bars switched off in Manufacturing settings, the list shows the pieces and estimates the bars by their total length instead.
Sheets
Section titled “Sheets”Pieces with a width are cut from sheets. They’re listed with their sizes, and the sheets needed are worked out by area: the pieces’ area ÷ a sheet’s area, plus the product’s waste allowance, rounded up. How the pieces fit on each sheet isn’t planned. A piece too big for the sheet either way round is named in a warning.
Print it
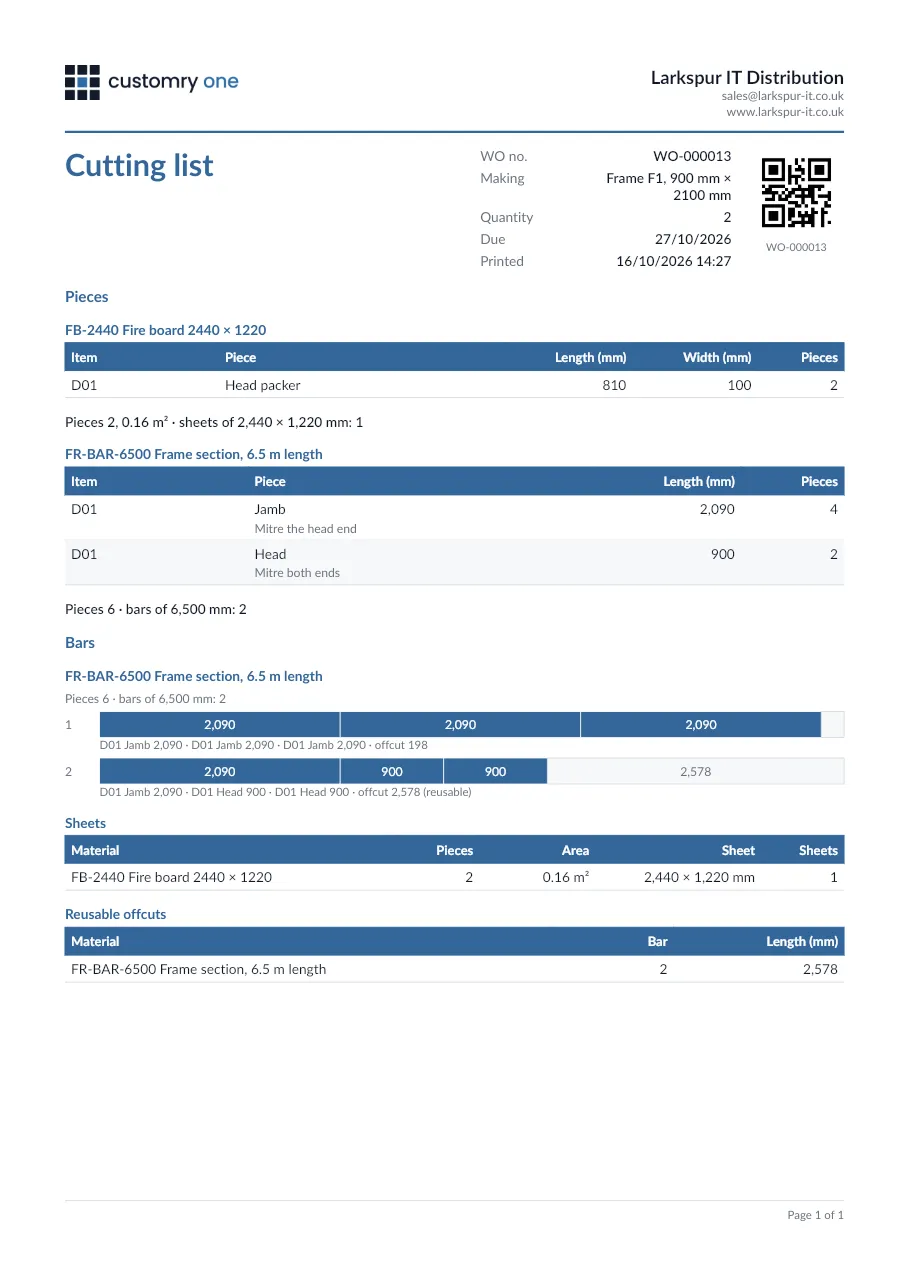
Section titled “Print it”On the Cutting list tab, select Print cutting list for it as a PDF, or Download CSV for the pieces as a spreadsheet (one row per piece and item, with the material, works order, lengths and counts), for a saw’s software, say.
The PDF has the works order’s number, what it’s making, the quantity and due date, with its QR code for the Shop floor, then for each material the pieces, the bars drawn to scale, the sheets, the reusable offcuts and the works order’s instructions, and boxes to sign. Costs are never printed, and cutting lists aren’t emailed. Its layout and the sections it prints are set in Administration → Document templates → Cutting list (see Documents and branding).
Cut for several works orders at once
Section titled “Cut for several works orders at once”Cutting the pieces for several works orders together uses fewer bars than cutting each on its own. Tick the works orders on Manufacturing → Works orders, or tick rows on To make (their works orders are used), and select Cutting list. You get one PDF, a cutting run: every works order’s pieces by material, each naming its works order, and the bars planned across all of them. The same works orders always give the same run. It can cover up to 200 works orders.
The job pack can have each works order’s own cutting list after it: tick Include cutting lists beside Job pack.
On the Shop floor
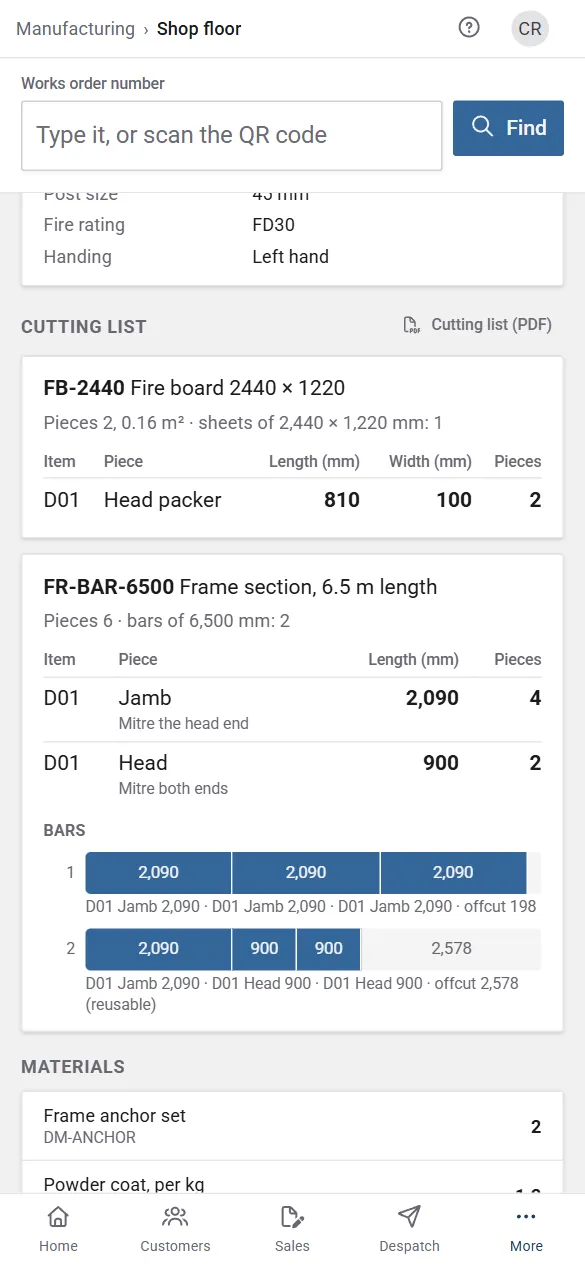
Section titled “On the Shop floor”On the Shop floor page, a works order with cut pieces shows its Cutting list under the specification, in larger type: the pieces and the bars, to read at the saw. Select Cutting list (PDF) to print it. Pieces aren’t ticked off as they’re cut.
Whole bars on the works order
Section titled “Whole bars on the works order”A works order needs the material its cut pieces use. Before it’s released, that’s the share of a bar the configuration worked out (two 2,060 pieces and an 860 of a 6,000 bar is 0.83 of a bar for each one made).
When it’s released, with Works orders need whole bars on (and Optimise bars), a bar material that’s counted in whole bars needs the number of bars its cutting list uses for that works order instead, so what’s reserved, issued and costed is whole bars. The history says so (“2 bars of BAR-1 from the cutting plan”). A material is counted in whole bars when it has a cut length and its unit of measure rounds quantities up (set on the unit in Administration → Units of measure), and isn’t a unit of length or area. Adding or taking off items, or changing the quantity, while it’s released and nothing’s booked works the bars out again. Sheets, and materials stocked by length or area, keep the configuration’s figure.
Who can see them
Section titled “Who can see them”Anyone who can see works orders can see and print their cutting lists. The Shop floor’s needs the permission to record what’s made on works orders.